Conducting a model execution
Once your dataset has been properly uploaded, edited and reviewed, you can proceed to conduct a simulation. This page outlines the steps for launching a model run from the Pharoes platform.
Step-by-Step Guide
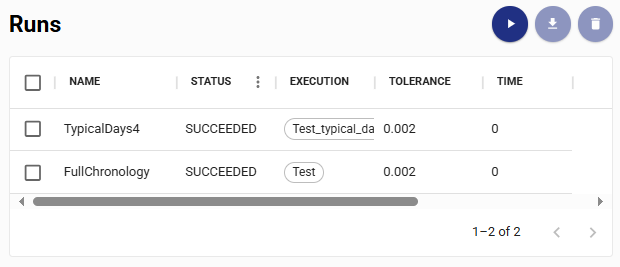
Open the “Runs” Tab Inside your project view, navigate to the Runs tab. This is where all previous and ongoing simulations are listed.
Click on “Start Run” Click the Start Run button to initiate a new model execution.
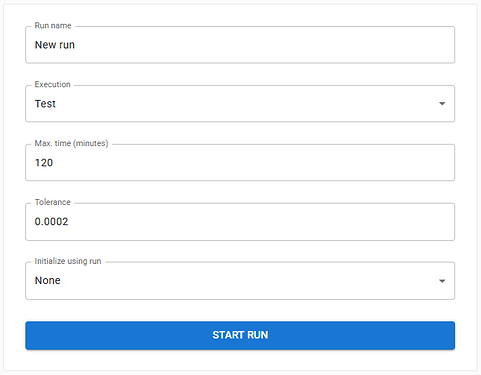
Fill in the Run Configuration A form will appear where you need to specify the parameters for the simulation:
Run name: A user-defined name to identify the run (e.g., “Baseline scenario – June 2025”).
Execution: Choose the execution configuration to apply (e.g., solver version, hardware settings).
Max. time: The time limit (in minutes) for the solver to run before finishing.
Tolerance: Define the acceptable solution gap (e.g., 0.0002 for 0.02%) to balance speed and accuracy.
Initialize using run: Optionally, select a previous execution to warm-start the simulation. This can speed up convergence for similar runs.
Click “Start Run” Once all parameters are configured, click Start Run to launch the model execution.
Wait for Completion The run will begin processing. Depending on model size and configuration, this may take a few minutes. Please wait until the run reaches finalized status before attempting to view results.
Notes
While the run is in progress, the status will be displayed in the Runs list.
If the run fails, an error message will be shown. You can inspect the logs for debugging.
Once the run completes, output results and performance metrics will be available for review and download.